 |
Email: mment340@gmail.com Phone: 07876 377609 |
|||||||||||||||||
| 1 | ||||||||||||||||||
 |
||||||||||||||||||
Custom Made Rifle Bullets Hand Crafted in Liverpool, England |
||||||||||||||||||
| Building a Bullet Cariboo Bonded, Ball Tip |
||||||||||||||||||
Out of all the bullets I make the Cariboo Bonded, Ball Tip is the most complex and time consuming of them all, there are no short-cuts, no work arounds, just stick to the procedures. Hopefully this will give you a better understanding of what goes into these bullets. |
||||||||||||||||||
Cleaning An essential element in bonding the lead core to the jacket is that all metal parts are clean and free from any form of grease. I use a specialist surface active agent containing anions and cations at about 60oC to remove all traces of grease, the elevated temperature speeds up the process. The detergent then needs to be removed, using copious quantities of clean fresh water, several small washes are far more effective than a single large wash, then they need to be dried. I use a hot air blower to dry everything. This is my standard method of cleaning. For bonded core bullets, once everything is clean and dry, the components should only be handled when wearing nitrile rubber gloves, even the natural oils from your skin can prevent the bonding process from being successful. |
||||||||||||||||||
Weighing Weighing components should only be carried out in a draft free room at constant temperature, and the components you are weighing should also be at ambient temperature. Hot or cold items being weighed will cause thermals around the balance causing variations in weight readings. This applies equally to when you are reloading your ammunition! Note: I am an analytical chemist, I’m used to using balances (that is the correct term!) that cost thousands of pounds, not a couple of hundred. The reloading scales we use to make ammunition, and I use to make bullets, are adequate for what we need, but that is all! |
||||||||||||||||||
Procedure I’m going to use the .458 450 grain Cariboo Bonded BT as an example here, because it encompasses just about all potential elements in its manufacture.
The jackets and cores are now ready to be bonded together and should only be handled when wearing nitrile rubber gloves. |
||||||||||||||||||
 |
Flux The flux used to bond the lead core to the jacket consists of some highly corrosive and toxic chemicals and should only be handled when wearing suitable PPE, and in a place with adequate extraction. This is not nice stuff!
So, now the core is bonded to the jacket, and we can make bullets…! |
|||||||||||||||||
Flash melting the lead core using a propane torch |
||||||||||||||||||
 |
||||||||||||||||||
So, there you have it, how to make a bullet! It’s a lot of hard work and attention to detail but you get out what you put in, the terminal performance of these bullets is outstanding. |
||||||||||||||||||
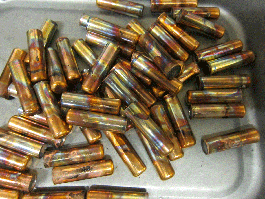
This is what they look like after the bonding process, now the cleaning process begins...! |
||||||||||||||||||
 |
||||||||||||||||||
 |
||||||||||||||||||
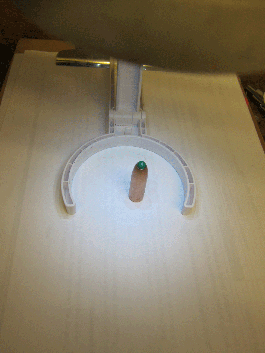
Fitting the Ball I use a magnifying glass on a stand, with built in LED lighting when I'm fitting the ball to the ogive. The polymer balls have a seam that must be below the top of the jacket, so they require careful positioning. The polymer ball should be very slightly too large for the opening in the ogive, and just sit there. I use the swaging press to gently press the ball home. It's effortless and very contolled. The ogive is then closed so that it grips the polymer ball. And the bullet is done, apart from cleaning. |
||||||||||||||||||
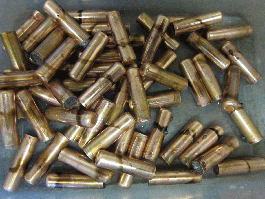
Neutralised, washed, cleaned & washed, now they spend some time in the polisher, until the remaining stains are removed. |
||||||||||||||||||
©MME Custom Rifle Bullets 2020 |
||||||||||||||||||